Spahn & Rose Lumber Co. offers more much than just lumber. With a wide variety of interior and exterior building materials, Spahn & Rose has partnerships with industry-leading brands, such as GAF, one of the country’s most popular shingle brands. With extensive knowledge of GAF shingles, Spahn & Rose experts designed a guide to help contractors in Iowa, Illinois and Wisconsin install GAF Timberline® roofing shingles, part of the GAF Roofing System.
Materials Available at a Spahn & Rose Near You
- GAF Timberline® roofing shingles
- GAF starter strips
- GAF Seal-A-Ridge® and Timbertex® ridge caps
- Chalk line
- Razor or utility knife
- Galvanized roofing nails
- Hammer or nail gun
- Smart square (optional)
- Pencil
- Tape measure
- Protective metal sheet
- Appropriate personal protective equipment
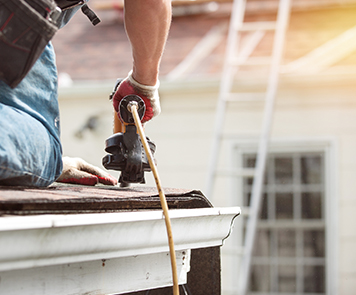
Beat Roof Leaks With Properly Installed Starter Strips

Starter strips are used as a guide to ensure all shingles are flush and level across the roof. They also provide a line of heat-activated adhesive to ensure the first line of shingles are properly attached. For exposure less than 6”, use either Pro-Start or WeatherBlocker starter strips.
- Measure the width of the starter strips, then subtract the desired width for overhang, typically a ¼” to ¾”.
- Mark the width of the starter strip, minus the overhang, onto the roof at both ends.
- Use a chalk line to mark a straight line on the roof between the two markings made at each end. This will ensure your start strips will be straight and flush across the length of the roof.
- GAF starter strips come as a single piece that needs to be cut through the center to create two strips. Cut as many strips as needed for the perimeter of your roof.
- Place the first starter strip at the lowest corner of your roof. Set it to include the desired overhang on both sides of the corner and flush with your chalk line. The adhesive tar strip should be closer to the drip edge of your roof than the peak of your roof.
- The first roofing nail should be placed 1.5” to 3” from the beginning side edge of the roof. Space the other three nails (you should have four nails total for each strip) 10” to 12” apart, with the fourth nail leaving a space of 1” to 2” from the ending edge of the strip. This will keep your starter strip more flush with your chalk line than working left to right.
- When installing Metric dimensioned shingles, you must trim 5” off the first WeatherBlocker starter strip or 3” off the first ProStart starter strip. This critical step ensures that the starter strip butt joints and overlapping shingles butt joints are off-set a minimum of 4”. Depending on the length of the shingle being installed, a 10” to 12” section of starter strip may periodically need to be cut and installed to meet the required 4” offset. Fasten the adjustment starter strip with two nails 1” to 2” from each side end.
- Set the second starter strip in-line with the chalk line, directly next to the first strip. Nail as above. Continue to place and nail starter strips along the lowest line of the roof accordingly.
- At the far end of the roof, cut the final starter strip (using a smart square if needed) to allow for the desired overhang. Nail into place.
- Continue to set starter strips up the sides of the roof using the same overhang, chalk line, and nailing technique. Do not rely on the initial starter strips as a guide for flushness. A chalk line will provide greater accuracy and quality of work.
Work Efficiently by Pre-Cutting GAF Shingles
GAF architectural shingles are designed to be laid in an offset pattern. This is both more aesthetically pleasing and improves drainage. To get the best look, and for ease of installation, pre-cut the first shingle in each row from the bottom to the top of the roof.
- Measure shingles at recommended intervals (typically 6”). Mark each sheet to be cut at 6”, 11” or 17” from the rake edge. GAF deck protection, part of the GAF roofing system, comes in a grid pattern that makes it easy to mark these intervals.
- The lowest row of shingles will begin with a full sheet. Cut the remaining rows at the marked intervals. If the roof is tall enough, you may need to start again with a full sheet midway, and then continue with pre-cut shingles.
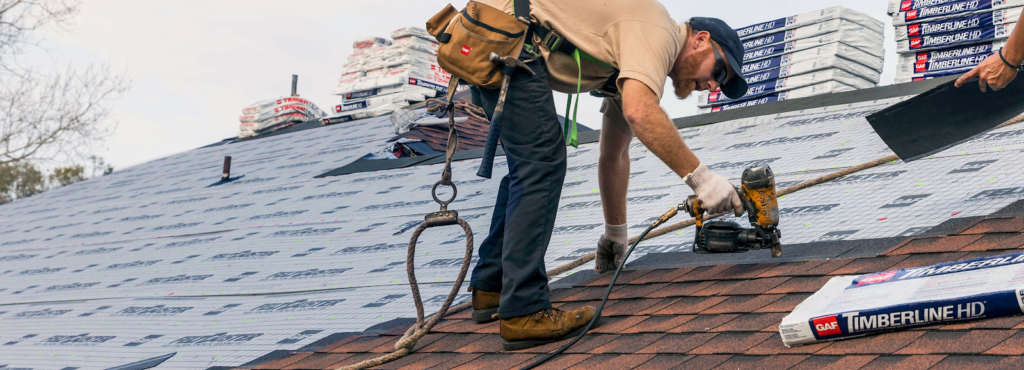
Best Way to Install GAF Shingles
- Begin by installing your pre-cut shingles to ensure your pattern is offset across the whole roof. Start by placing your first full sheet of shingles. This should completely overlay the starter strip at the lowest corner, including the overhang of the drip edge.
- Nails on GAF shingles go through the black marker strip. Nail the first full sheet in the same way as the starter strip, with one on each side, followed by a nail in the middle, and then at desired intervals or as required by local building codes.
- Once the first full sheet is in place, install the first pre-cut sheet directly above it. GAF shingles are designed with a white chalk guideline, which is used as a guide for the next row of shingles. The exposed area of the shingles below should be 5 ⅝”. This ensures appropriate coverage, adhesion and water-tightness. Make sure the bottom of the pre-cut shingle is flush with the white chalk line. Nail into place.
- Proceed with the rest of your first set of pre-cut shingles. If the roof is large enough that you reach a second full sheet of shingles, do not nail this in place yet.
- Once the first set of pre-cut shingles is in place, you can proceed to nail full sheets of shingles, flush with the one before it and also with the white chalk guideline, through the black tarline, across the roof. If your roof is a hip roof, cut the ends of the rows at the angle of the hip, leaving a small gap on either side of the hip, then follow the instructions below for installing ridge caps.
- Once a full set of offset full-sheet shingles is installed, you can proceed with your next set of pre-cut shingles and repeat Step 5 as needed until the roof is completely shingled.
- As you reach the peak of the roof, cut the final row of shingles so that they are nearly flush with the peak and the final row on the other side. A small gap is allowable. A large gap will cause the ridge cap to bow.
- Once all shingles are in place, cut the far rake edge, including overhang. A chalk line will give the straightest line and cleanest cut.
8 Smart Steps for Installing Shingles in Closed-Cut Valleys
Valleys are where a roof meets a gable that is built perpendicular to the roof. Shingles must be installed correctly in valleys to ensure proper water runoff.
- Install shingles as described in the section above, but without cutting, since there is no drip edge, peak or hip.
- Ensure that shingles overlap the valley centerline by at least 12”. Cut shingles that significantly exceed this length.
- Do not nail shingles within 6” of the valley centerline.
- Install shingles running from the gable edge or perpendicular roof to the valley, still ensuring the 12”-overlap and making sure there are no nails within 6” of the centerline.
- Mark a chalk line down the valley centerline.
- Using a protective metal sheet to ensure you don’t cut too deep, cut the top layer of shingles along the valley centerline.
- To ensure proper drainage, cut the top corner of each top shingle at a 45-degree angle from the top of the shingle to just above the white chalk guideline.
- Apply a roofing cement between top and bottom shingle layers. Refer to manufacturer’s instructions for the appropriate curing time for roofing cement.
How to Ensure Ridge Caps Stay Watertight
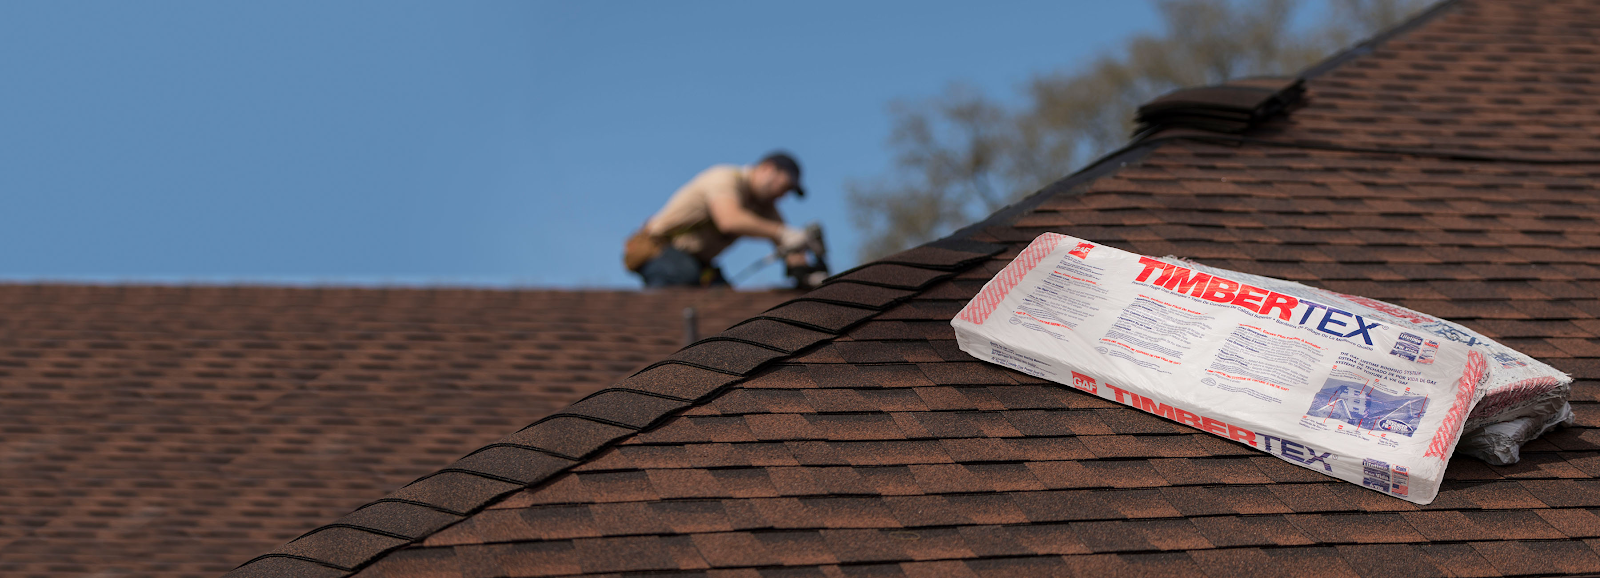
The ridge cap runs along the peak or hips of the roof, with tab shingles installed perpendicular to the architectural shingles. The ridge cap is there both for aesthetic purposes—it hides the seams of the GAF shingles—and to ensure water-tightness.
- Using GAF Seal-A-Ridge or TimberTex ridge caps in the same color as your architectural shingles, separate the ridge caps at the perforated edges.
- Start at the lowest hip intersection and work your way up.
- Cut your starter course and align so the adhesive is just inside the corner of the drip edge.
- Fasten the shingle with two nails. Be sure to use only zinc-coated steel or aluminum, 10-12 gauge barbed, deformed or smooth shank roofing nails with heads 3/8″ to 7/16” in diameter nails. The nails should be long enough to penetrate at least 3/4″ into wood decks.
- Trim the starter course flush with the drip edge.
- The next shingle should overlap the starter shingle completely, ensuring it extends past the drip edge on the eaves.
- Nail in place and trim flush with the drip edge.
- Align the next shingle using the alignment notches in the headlap area as a guide, but do not nail it down yet.
- Strike a chalk line up the hip, along the edge of the two shingles and parallel to the hip center line.
- Nail down the second shingle.
- Continue to work your way up the hip, keeping shingles aligned to the chalk line. Be sure to install shingles across the roof and on top of attic ventilation.
- When you reach the end, install a full shingle and fasten with two nails and then trim the shingle along the drip edge of the roof.
- To finish, apply two beads of roofing cement over the exposed nails.
Remember to give all GAF shingles enough time for tar lines to heat and cure. Refer to manufacturer’s specifications regarding temperature and time.
Find out how Spahn & Rose can help you complete your project on time and within budget. Visit a nearby location or call for quick delivery of high-quality building materials.